> ## Documentation Index
> Fetch the complete documentation index at: https://docs.xray.cool/llms.txt
> Use this file to discover all available pages before exploring further.
# 使用 Burp 进行联动
作者 [Lz1y](https://github.com/Lz1y)
在实际测试过程中,除了被动扫描,也时常需要手工测试。这里使用 Burp 的原生功能与 xray 建立起一个多层代理,让流量从 Burp 转发到 xray 中。
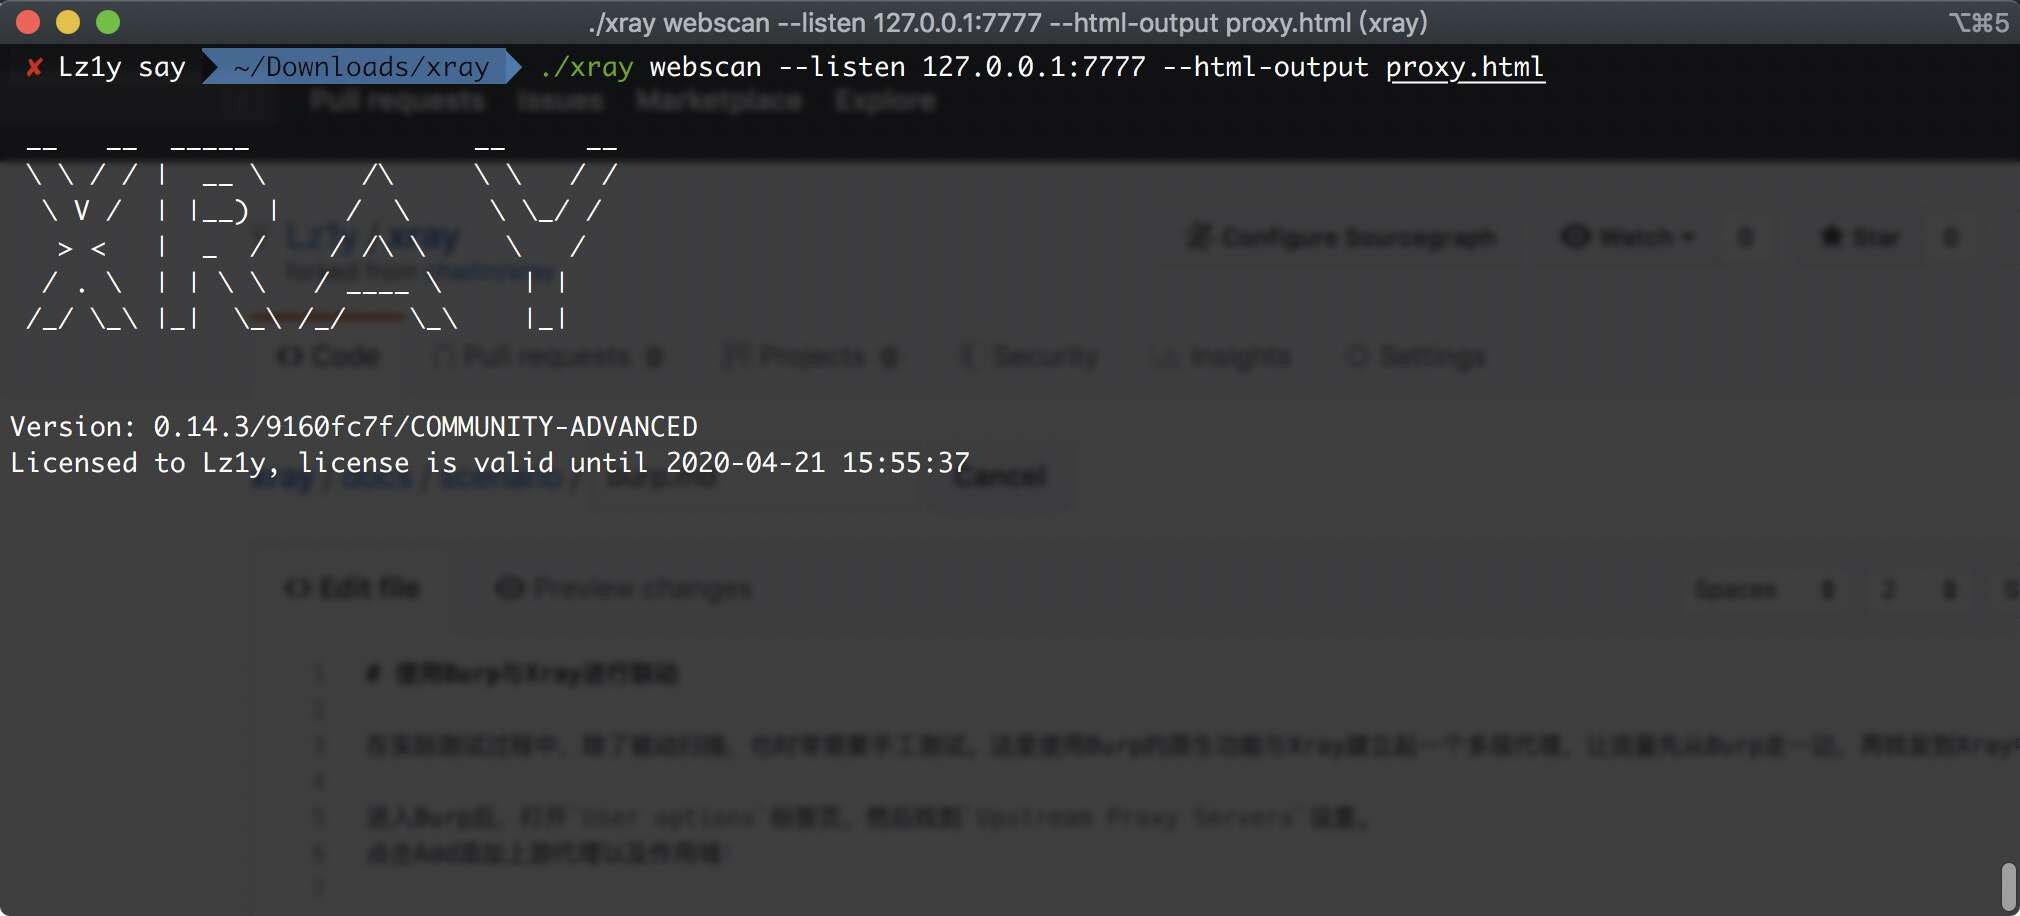
首先 xray 建立起 webscan 的监听
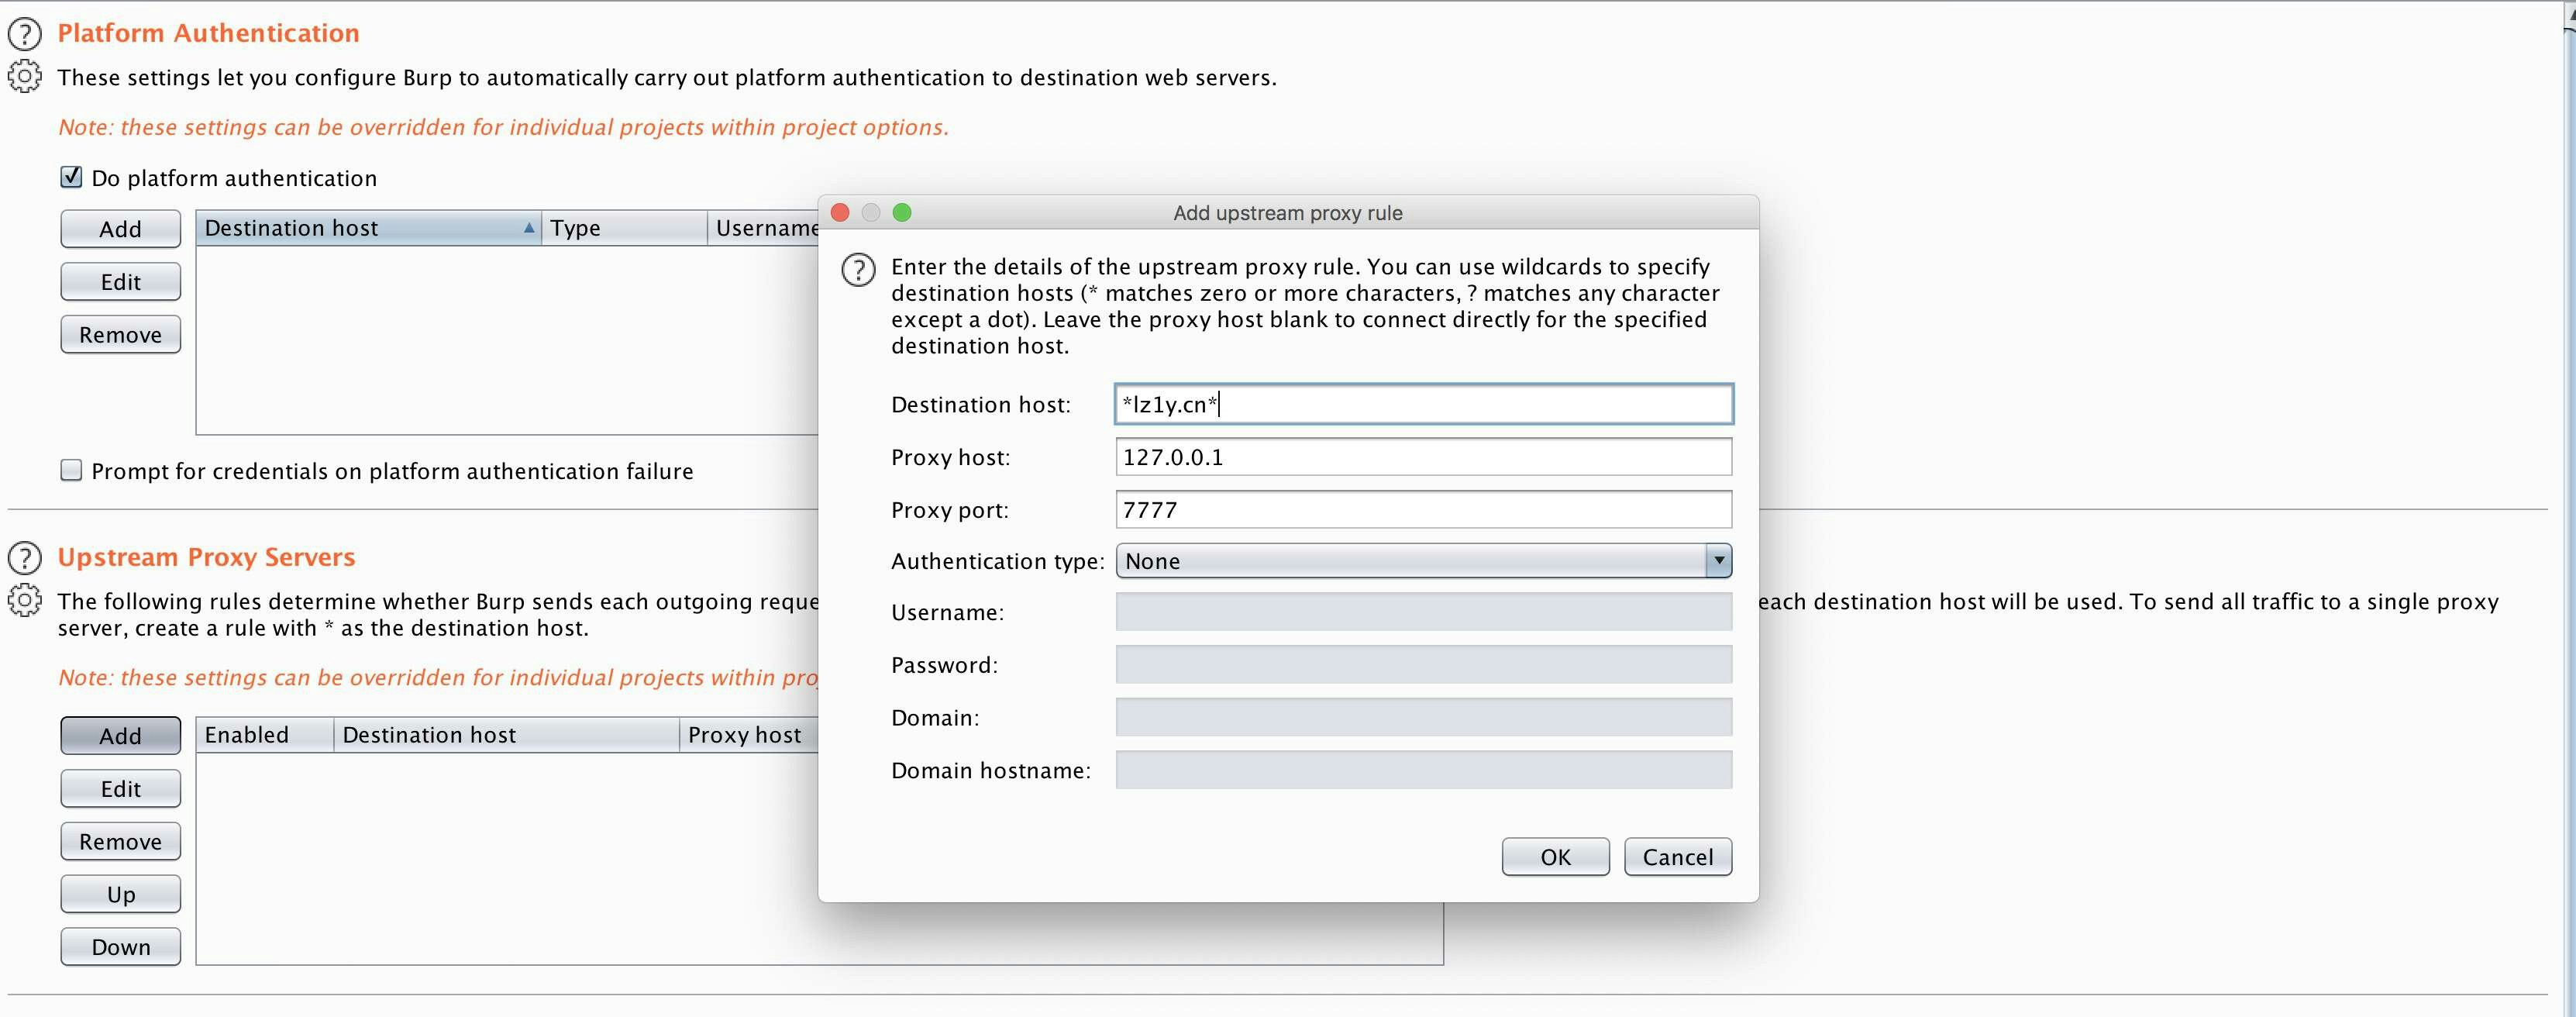
 进入 Burp 后,打开 `User options` 标签页,然后找到 `Upstream Proxy Servers` 设置。
点击 `Add` 添加上游代理以及作用域,`Destination host`处可以使用`*`匹配多个任意字符串,`?`匹配单一任意字符串,而上游代理的地址则填写 xray
的监听地址。
进入 Burp 后,打开 `User options` 标签页,然后找到 `Upstream Proxy Servers` 设置。
点击 `Add` 添加上游代理以及作用域,`Destination host`处可以使用`*`匹配多个任意字符串,`?`匹配单一任意字符串,而上游代理的地址则填写 xray
的监听地址。
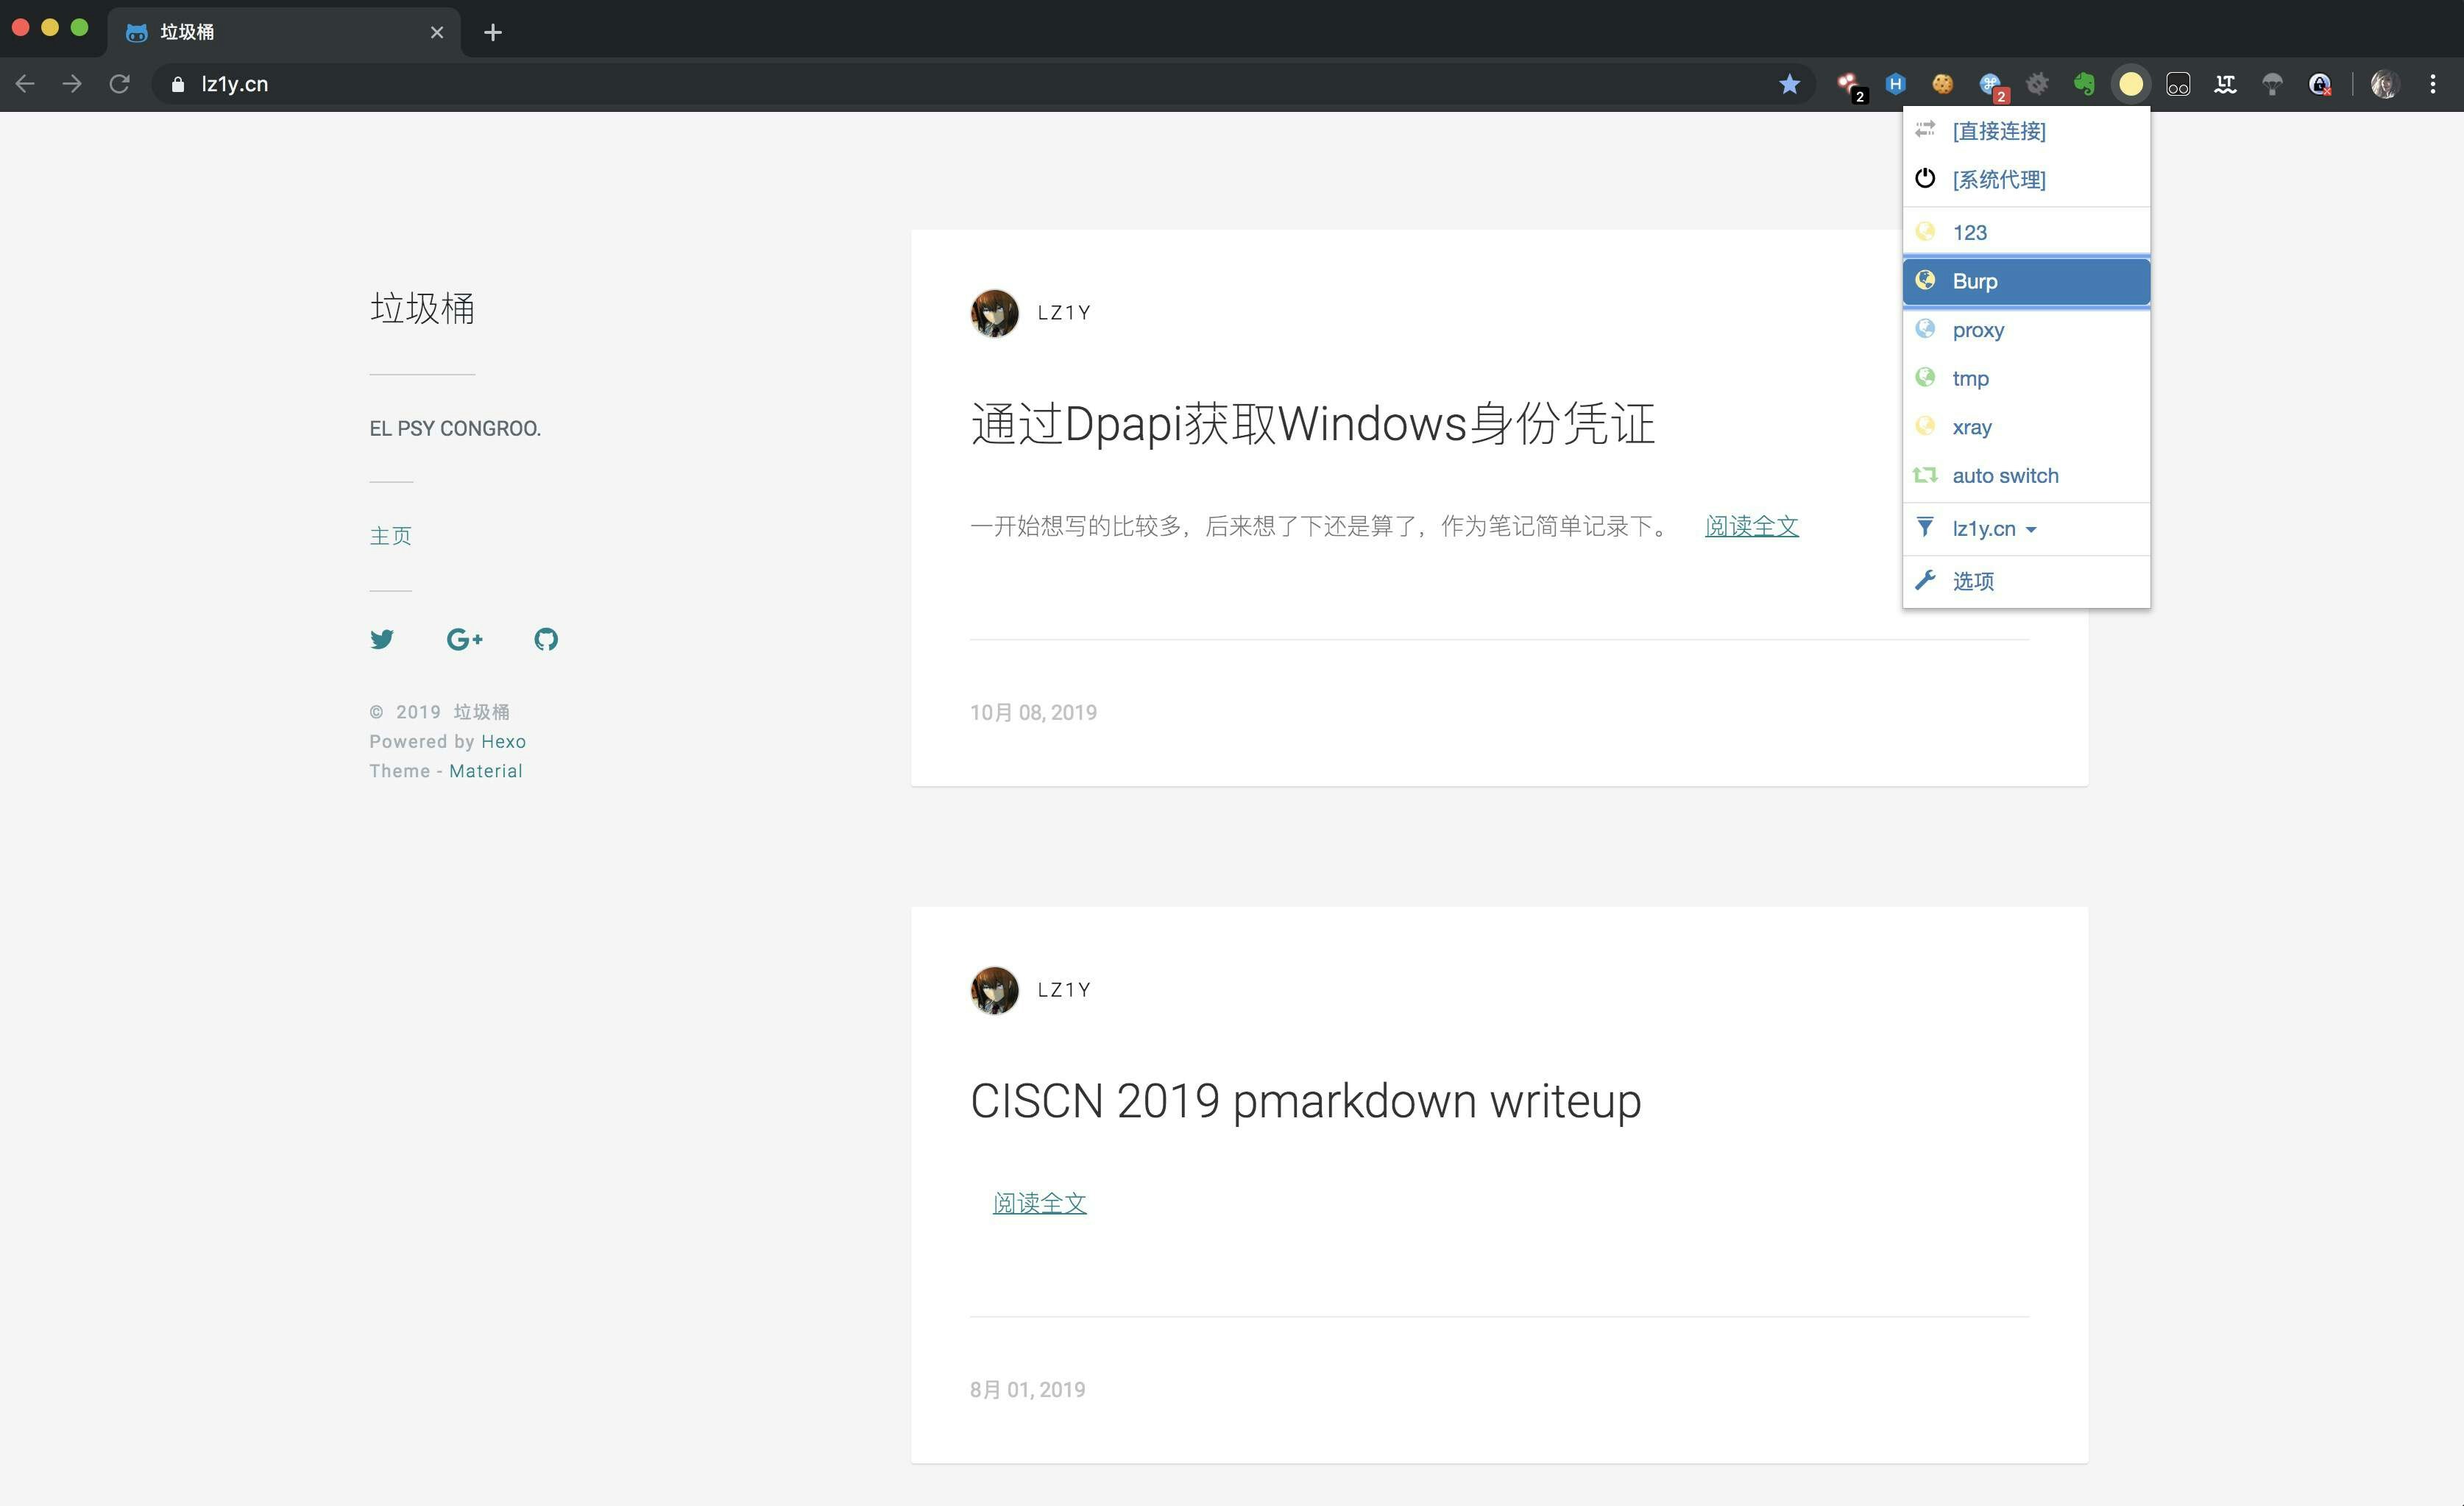
 接下来,在浏览器端使用 Burp 的代理地址
 此时,请求已经通过了 Burp
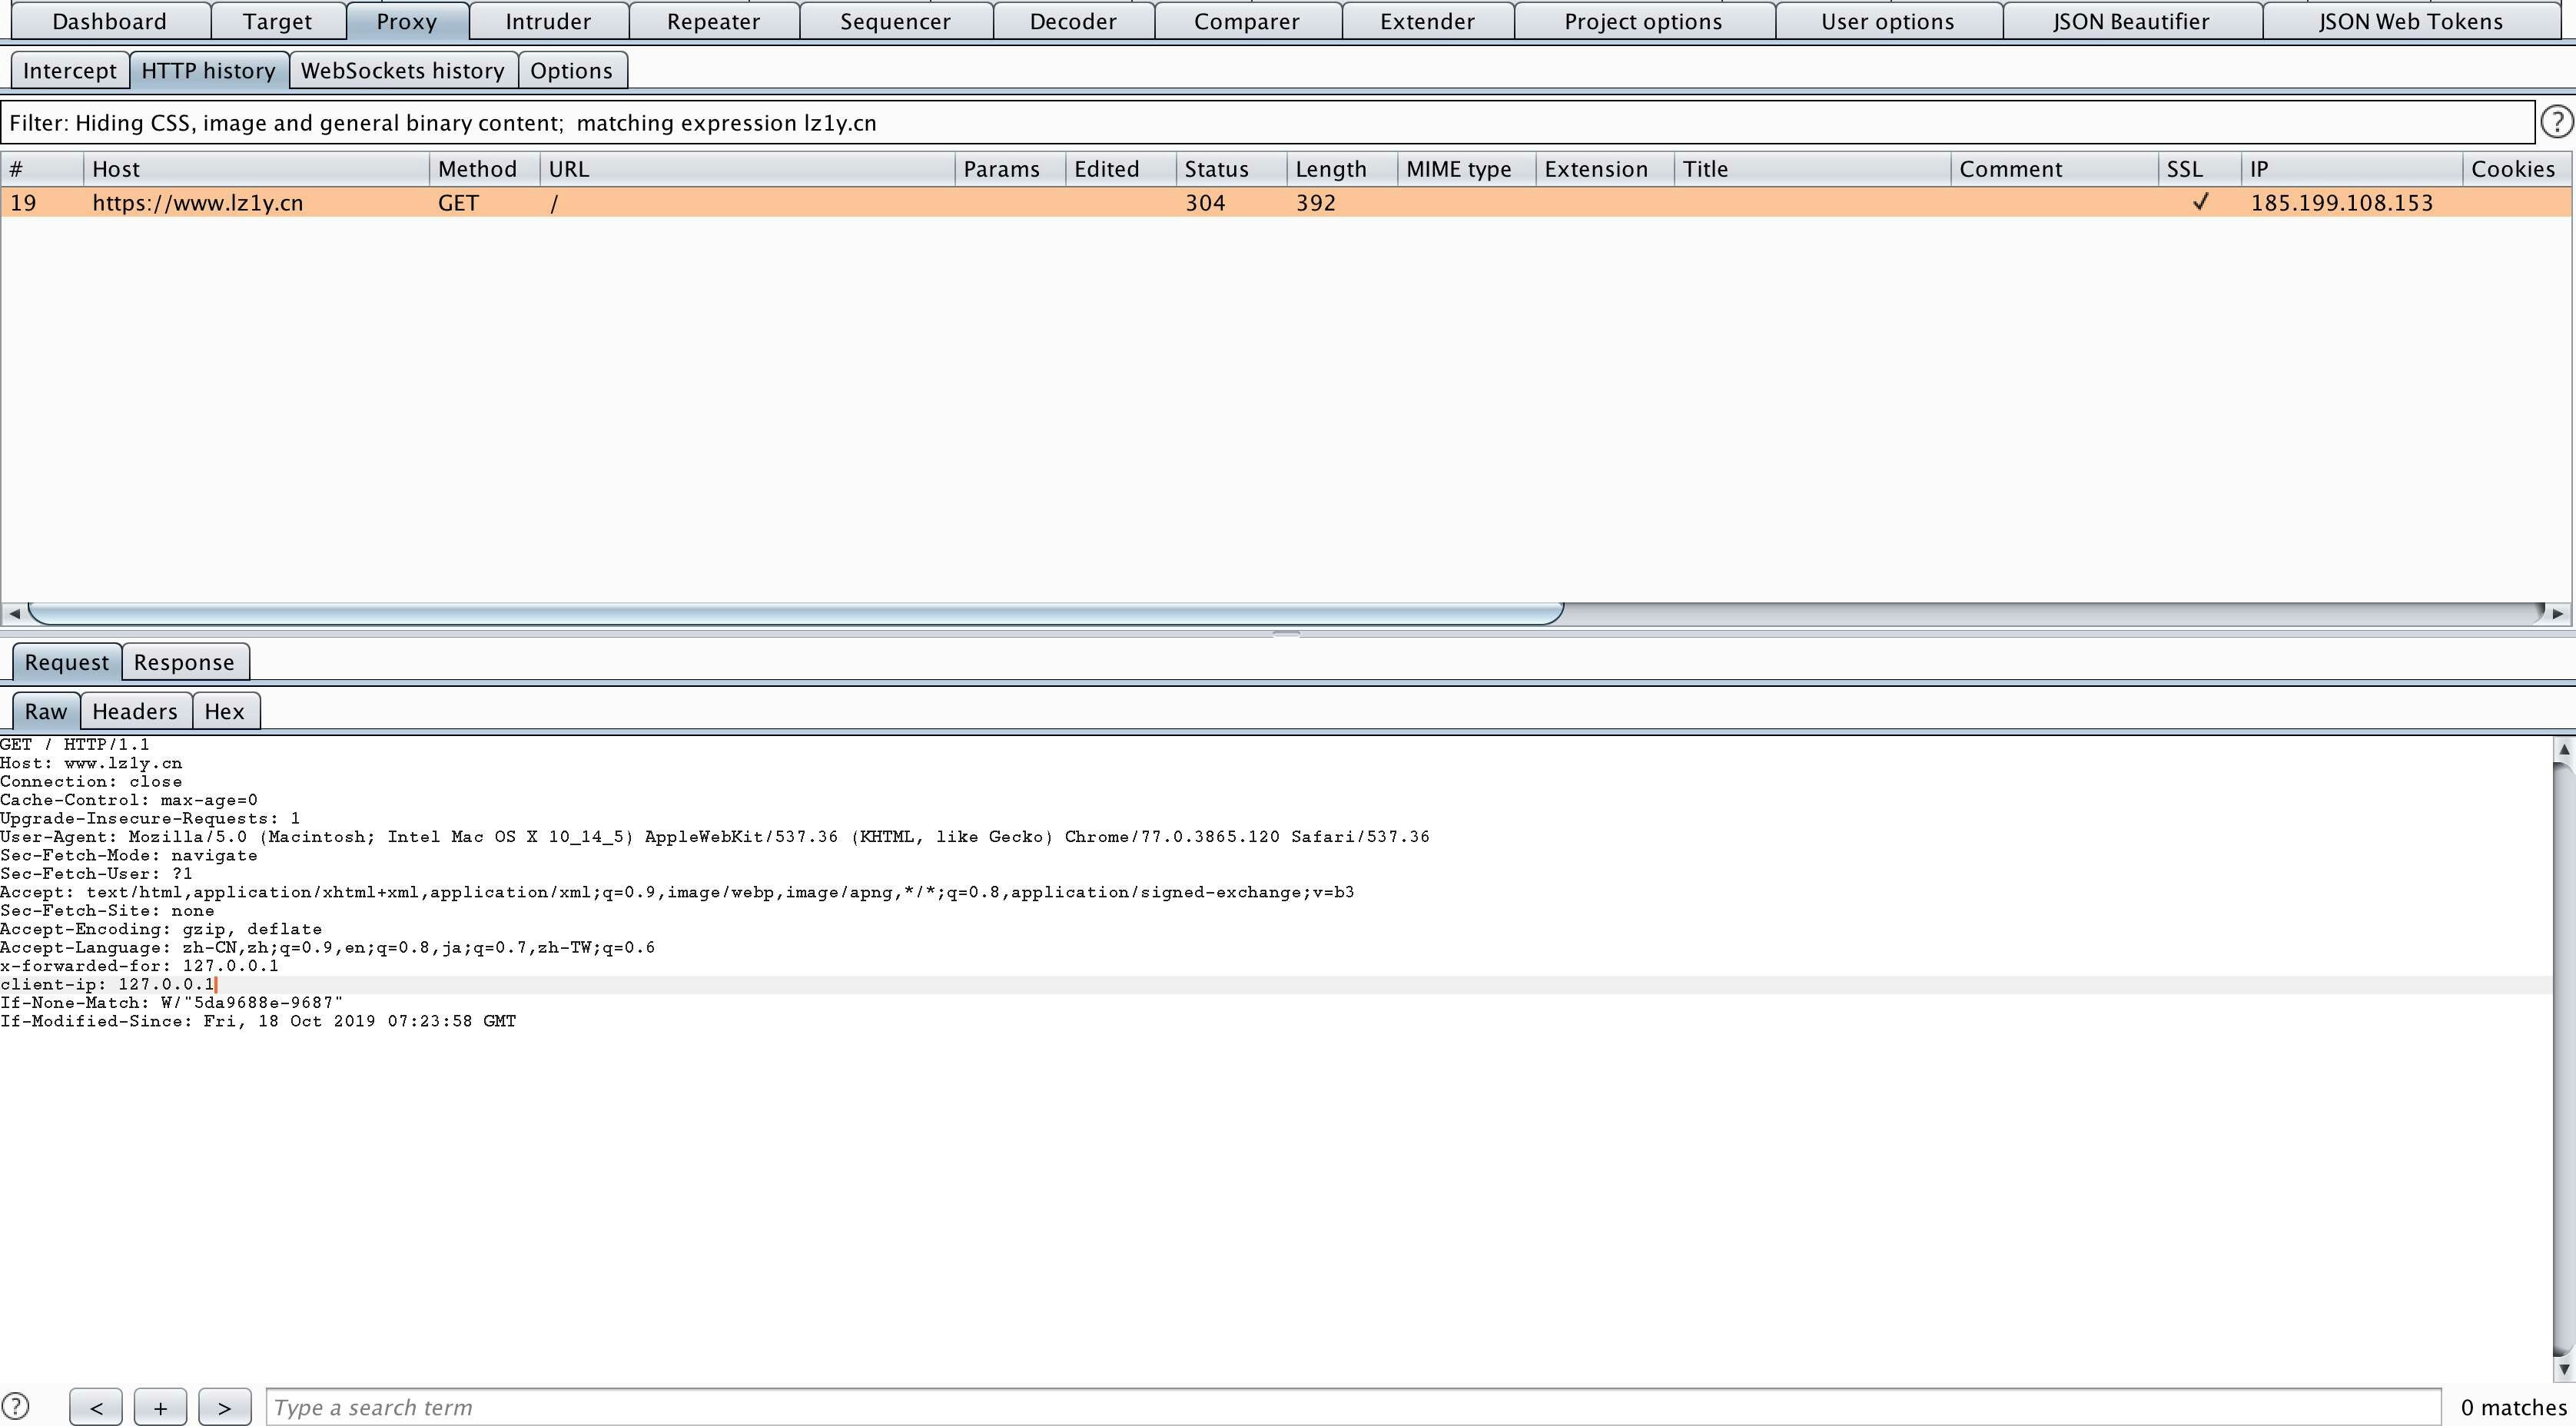 转发到了 xray 中
 至此,联动成功。